1. 깃허브 insights -> Network 에서 돌아갈 커밋을 확인한다.


2.  git reset --hard '헤드번호'

- 확인한 헤드 번호를 입력하면 되돌릴 수 있다.


3. git push origin +main 

- 일반적으로 커밋을 되돌리면 다시 pull해야 푸쉬할 수 있다고 에러메세지가 뜨는데 그럼 커밋을 되돌리고 서버에 반영할 수 없으므로 + 옵션을 사용하면 강제로 서버에 푸쉬할 수 있다.

스프링부트를 사용하여 AWS S3 버킷 연동하여 파일 업로드 하기


IAM사용자 키 엑세스키 생성에 이어서 스프링 부트에서 S3에 파일을 업로드할 수 있도록 구현하였다.

또한 업로드된 파일의 이름과 주소를 DB에 저장한다.


1. 먼저 dependencies에 의존성을 추가한다

implementation 'org.springframework.cloud:spring-cloud-starter-aws:2.2.6.RELEASE'


2. application.yml 설정

spring:
  jackson:
    property-naming-strategy: SNAKE_CASE
  datasource:
    url: jdbc:mysql://localhost:3306/community?serverTimezone=Asia/Seoul
    username: root
    password: password
  redis:
    host: localhost
    port: 6379
  jpa:
    hibernate:
      ddl-auto: create
    show-sql: true
    properties:
      hibernate:
        format_sql: true
  data: # spring data rest - 관련 설정
    rest:
      base-path: /api  #endpoint start path
      detection-strategy: annotated
  profiles:
    include: API-KEY   #key가 저장된 yml 연동


cloud: # AWS 계정연동 관련설정
  aws:
    region:
      static: ap-northeast-2
#    s3:
#      credentials:
#        access-key: access-key
#        secret-key: secret-key
    stack:
      auto: false

핵심은 spring.profies: 부터의 설정들이다


- spring.profiles.include : 깃에 올리지 않을 엑세스키와 시크릿키가 담긴 application-API-KEY.yml파일을 연결했다. 

환경변수를 통해 키를 관리해준다면 주석처리된 부분을 해제하여 환경변수를 통해 엑세스키와 시크릿키를 할당하면 된다.


- cloud설정에서 aws관련 내용들을 적어준다


- 마지막줄 stack.auto: false는 관련 내용을 사용하지 않음으로 반드시 적어준다.


3.  .gitignore 설정 (옵션)

### api key 관련 ###
/src/main/resources/application-API-KEY.yml

이렇게 추가해주면 키가담긴 yml파일이 깃에 올라가지 않는다.


4. 터미널에 git -rm -r -cached /src/main/resources/application-API-KEY.yml 입력

- 해당 명령어를 입력하면 기존 추적되던 캐시를 삭제한다.


5. Entity

@NoArgsConstructor
@Setter @Getter
@Entity
public class UploadFile{
    @Id
    @GeneratedValue(strategy = GenerationType.IDENTITY)
    private Long fileId;
    private String fileName;
    private String imagePath;
    @ManyToOne
    @JoinColumn(name = "board_id")
    private Board board;

    public UploadFile(String fileName, String imagePath) {
        this.fileName = fileName;
        this.imagePath = imagePath;
    }
}

- 추후 Board엔티티와 매핑을 위해 조인컬럼을 사용하였다.


6. service

@RequiredArgsConstructor
@Service
public class S3Service {

    private String S3Bucket = "kjs-project-upload"; // Bucket 이름
    private final AmazonS3Client amazonS3Client;
    private final UploadFileRepository uploadFileRepository;

    public List<String> uploadFiles(MultipartFile[] multipartFileList) throws Exception {
        List<String> imagePathList = new ArrayList<>();

        for (MultipartFile multipartFile : multipartFileList) {
            String fileName = multipartFile.getOriginalFilename(); // 파일 이름
            long size = multipartFile.getSize(); // 파일 크기

            ObjectMetadata objectMetaData = new ObjectMetadata();
            objectMetaData.setContentType(multipartFile.getContentType());
            objectMetaData.setContentLength(size);

            // S3에 업로드
            amazonS3Client.putObject(
                    new PutObjectRequest(S3Bucket, fileName, multipartFile.getInputStream(), objectMetaData)
                            .withCannedAcl(CannedAccessControlList.PublicRead)
            );

            String imagePath = amazonS3Client.getUrl(S3Bucket, fileName).toString(); // 접근가능한 URL 가져오기
            imagePathList.add(imagePath); //String Type URL주소

            //엔티티에 저장하는 로직

            UploadFile uploadFile = new UploadFile();
            uploadFile.setFileName(fileName);
            uploadFile.setImagePath(imagePath);
            uploadFileRepository.save(uploadFile);
        }
        return imagePathList;
    }
}


7. Repository

public interface UploadFileRepository extends JpaRepository<UploadFile, Long> {}

- @Repository 는 상속받는 JPARpository에 포함되어있기 때문에 적지 않아도 된다.


8. Contorller

@RestController
@RequiredArgsConstructor
public class BoardController {
    private final S3Service s3Service;

    @PostMapping("/upload")
    public ResponseEntity<Object> upload(@RequestParam MultipartFile[] files) throws Exception {
        List<String> imagePathList = s3Service.uploadFiles(files);

        return new ResponseEntity<>(imagePathList, HttpStatus.OK);
    }


9. Postman 테스트

- body에 기존 Json형식으로 데이터를 넣는것이 아닌 form-data형식으로 데이터를 넣어줘야한다.


결과값으로 사진파일을 확인할 수 있는 S3주소를 리턴한다.


또한 연결된 DB를 확인해보면 해당 파일명과 S3버킷 안에있는 파일URL이 저장된 것을 확인할 수 있다.


참고 : https://jforj.tistory.com/261

스프링 부트에서 AWS에 연동하여 S3버켓에 파일 업로드를 하기위해 찾아보았다.

블로그 글들을 보며 사용자를 생성하였는데 AWS가 조금 변경되었는지 엑세스키가 생성이 되지 않았다.


엑스키를 직접 생성해 주어야 하는것 같다


방법은 다음과 같다


사용자를 생성하면 우측에 엑세스키가 활성화 되지 않는다고 뜬다.(본인은 이미 만들어서 엑세스키 활성화되어있음)

1. 보안 자격증명 -> 엑세스키 만들기 클릭

2. 엑세스키 모범사례 및 대안에서 로컬 코드 선택

3. 태그는 선택적으로 사용. 비워둔채로 엑세스키 만들기 눌러도 된다.

4. 생성된 엑세스 키와 시크릿 키를 잘 기억하고 저장해둔다 .

5. 최초 화면처럼 엑세스키가 생성된것을 확인할 수 있다.


'Study > 기타' 카테고리의 다른 글

AWS 로컬 < -- > EC2 파일 복사하기  (0) 2023.03.18
AWS 수동배포  (0) 2023.03.18
AWS EC2 - 배포 자동화를 위한 사용설명  (0) 2023.03.02
HTTP  (1) 2022.11.30
Html / Css  (0) 2022.11.17

두가지 방법을 통한 설정으로 간단하게 변환할 수 있다.


1. 개별적으로 @JsonProperty(" 출력값 ") 을 할당해주면 된다

@Setter @Getter
@AllArgsConstructor
@NoArgsConstructor
public static class Response {
    @JsonProperty("comment_id")
    private Long commentId;
    private String contents;
    @JsonProperty("like_count")
    private int likeCount;
    @JsonProperty("create_at")
    private LocalDateTime createdAt;
    @JsonProperty("modified_at")
    private LocalDateTime modifiedAt;
    @JsonProperty("board_id")
    private long boardId;
    @JsonProperty("member_id")
    private long memberId;
}

2. 

application.yml 설정으로 변환하기

spring:
  jackson:
    property-naming-strategy: SNAKE_CASE


검색기능 사용을 위한 기본편 이후 controller부에서 사용하기 위한 service로직 구현까지의 내용이다


@RepositoryRestResource // spring data rest 사용하기 위함
public interface ArticleRepository extends
        JpaRepository<Article, Long>,
        QuerydslPredicateExecutor<Article>, //해당 엔티티 안에있는 모든 검색기능을 추가해줌 // 완전 동일해야만 동작
        QuerydslBinderCustomizer<QArticle> // 부분검색, 대소문자 구분 등을 위함
{
    Page<Article> findByTitleContaining(String title, Pageable pageable); //제목검색
    Page<Article> findByContentContaining(String content, Pageable pageable); //내용검색/ Containing-부분검색
//    Page<Article> findByUserAccount_UserIdContaining(String userId, Pageable pageable); //회원id검색
//    Page<Article> findByUserAccount_NicknameContaining(String nickName, Pageable pageable); //닉네임검색
    Page<Article> findByHashtag(String hashtag, Pageable pageable); //제목검색

    @Override
    default void customize(QuerydslBindings bindings, QArticle root){
        //Article에 대해 선택적인 필드에 대한 검색
        bindings.excludeUnlistedProperties(true); //리스팅 하지 않은 프로퍼티 검색 제외
        bindings.including(root.title, root.content, root.hashtag, root.createdAt, root.createdBy); //검색 컬럼
        bindings.bind(root.title).first(StringExpression::containsIgnoreCase); // like '%${v}%'/ 부분검색
        bindings.bind(root.content).first(StringExpression::containsIgnoreCase);
        bindings.bind(root.hashtag).first(StringExpression::containsIgnoreCase);
        bindings.bind(root.createdAt).first(DateTimeExpression::eq);//원하는 날짜검색 /시분초 동일하게 넣어야함
        bindings.bind(root.createdBy).first(StringExpression::containsIgnoreCase);
    }
}

* Repository

레파지토리 부분에 서비스 로직에 사용할 메서드를 추가하였다.

Containing은 부분검색을 가능하게 만들어준다.


@Slf4j
@RequiredArgsConstructor
@Transactional //import annotation 유의해서 가져오기
@Service
public class ArticleService {
    private final ArticleRepository articleRepository;
    //게시글 페이지형 검색
    @Transactional(readOnly = true) // 변경하지 않기때문에 readonly
    public Page<Article> searchArticles(SearchType searchType, String search_keyword, Pageable pageable) {
        // 검색어 없이 검색하면 게시글 페이지를 반환.
        if (search_keyword == null || search_keyword.isBlank()) {
            return articleRepository.findAll(pageable);
        }
        // 항목에 따른 검색 - 조회
        switch (searchType) { // return이 되는 switch ->와 함께 사용 java14이상부터 사용가능
            case TITLE:
                return articleRepository.findByTitleContaining(search_keyword, pageable);
            case CONTENT:
                return articleRepository.findByContentContaining(search_keyword, pageable);
//            case ARTICLE_ID:
//                return articleRepository.findByUserAccount_UserIdContaining(search_keyword, pageable);
//            case NICKNAME:
//                return articleRepository.findByUserAccount_NicknameContaining(search_keyword, pageable);
            case HASHTAG:
                return articleRepository.findByHashtag(search_keyword, pageable);
        }
        return null;
    }

* Service

일치하는 검색어가 없으면 전체 게시글 페이지를 반환하고 있으면 해당하는 페이지만 반환하도록 로직을 구성하였다.


public enum SearchType {
    TITLE, CONTENT, ARTICLE_ID, NICKNAME, HASHTAG
}


엔티티 검색을 하기위해 필요한 컬럼명 등록


@RequiredArgsConstructor
@Validated
@RequestMapping("/articles")
@RestController
public class ArticleController {

    private final ArticleService articleService;
    private final ArticleMapper articleMapper;


    @GetMapping //부분검색 //http://localhost:8080/articles?searchType=CONTENT&searchValue=검색어
    public ResponseEntity searchArticles(@RequestParam(required = false)SearchType searchType,//required = false- 선택적 파라미터
                           @RequestParam(required = false)String searchValue,
                           @PageableDefault(size = 10,sort = "createdAt", direction = Sort.Direction.DESC)Pageable pageable)
    {
        Page<Article> articlePages = articleService.searchArticles(searchType, searchValue, pageable);
        List<Article> articles = articlePages.getContent();
        List<ArticleDto.Response> response = articleMapper.articleToArticleListResponse(articles);
        return new ResponseEntity(response, HttpStatus.OK);
    }

* Controller

부분검색기능을 받는 컨트롤러에 Getmapping부

@PageableDefault를 통해 pageble을 입력해주지 않으면 디폴트값이 들어가게 된다.


content내용 검색을 위한 파라미터 입력 예) searchType=CONTENT&searchValue=검색내용


@Mapper(componentModel = "spring", unmappedTargetPolicy = ReportingPolicy.IGNORE)
public interface ArticleMapper {
    Article articlePostToArticle(ArticleDto.Post articlePostDto);
    Article articlePatchToArticle(ArticleDto.Patch articlePatchDto);
    ArticleDto.Response articleToArticleResponse(Article article);
    List<ArticleDto.Response> articleToArticleListResponse(List<Article> articles);
}

* Mapper

컨트롤러 부에서 엔티티를 ResponseDto로 변환할 매퍼 검색기능에서는 페이지를 반환하기 위해

List<response>가  사용된다.


@Getter
@ToString(callSuper = true) //callSuper = true - 안쪽까지 들어가서 ToString을 찍어냄
@Table(indexes = {
        @Index(columnList = "title"),
        @Index(columnList = "hashtag"),
        @Index(columnList = "createdAt"),
        @Index(columnList = "createdBy"),
})
@Entity
@NoArgsConstructor//(access = AccessLevel.PROTECTED) //기본생성자의 무분별한 생성을 막아서 의도치않는 엔티티 생성을 막음
public class Article extends AuditingFields {
    /* @Setter을 클래스레벨로 설정하지 않는 이유 id, 시간 등 을 Setter 하지 않기 위함*/
    @Id @GeneratedValue(strategy = GenerationType.IDENTITY)
    private Long articleId;
   // @Setter @ManyToOne(optional = false)
    //private UserAccount userAccount; //유저 정보(id) 매핑
    @Setter @Column(nullable = false)
    private String title; // 제목
    @Setter @Column(nullable = false, length = 10000)
    private String content; // 본문
    @Setter
    private String hashtag; // 해시태그

    @OrderBy("createdAt DESC") // 생성 시간순 정렬
    @OneToMany(mappedBy = "article", cascade = CascadeType.ALL)// 모든경우 외래키를 걸어줌/ 실무에선 양방향바인딩 지양
    @ToString.Exclude //조회하는 과정에서 무한 순환참조 방지, 퍼포먼스 이슈로 인하여 설정 / 연결고리를 끊어줌
    private final Set<ArticleComment> articleComments = new LinkedHashSet<>();

    public Article(String title, String content, String hashtag) { //도메인과 관련있는 정보만 오픈
        //this.userAccount = userAccount;
        this.title = title;
        this.content = content;
        this.hashtag = hashtag;
    }
/**
    //new를 사용하지 않고 생성자 생성하기 위함  // of는 매개변수가 뭐가필요한지 가이드해줌
    public static Article of(String title, String content, String hashtag) {
        return new Article(title, content, hashtag);
    } // @Mapper 사용 할때에는 쓸수없는 방법
**/

    //equalse 해시코드 기능 생성(alt+insert에 있음) / id만 같으면 같은게시물
    @Override //동일성 검사
    public boolean equals(Object o) {
        if (this == o) return true;
        if (!(o instanceof Article)) return false;
        Article article = (Article) o;
        return articleId!=null && articleId.equals(article.articleId); //데이터가 insert되기 전에 만들어진 id는 탈락
    }

    @Override
    public int hashCode() { //동일성 검사를 마친 아이디에 대해서만 해시
        return Objects.hash(articleId);
    }
}

* Entity

검색 대상 엔티티


postman URI  ex) http://localhost:8080/articles?searchType=CONTENT&searchValue=검색

- article엔티티내의 content컬럼에서 검색이라는 단어가 포함되어있는 항목들을 모두 반환한다.

Security 설정후 잘 작동하던 PostMapping 컨트롤러가 작동하지 않았다.


CSRF() 로인해서 post 요청이 막히는것.

        http.csrf().disable();

SecurityConfig.java 의 SecurityFilterChain을 상속받은 메서드에 위 코드를 추가해주면 해결된다.


@Configuration // 설정값으로 사용
public class SecurityConfig {

    @Bean // SecurityAdapter상속 대신 사용 /최신  // 시큐리티 기본 로그인화면 탈출하기위함
    public SecurityFilterChain securityFilterChain(HttpSecurity http) throws Exception {
        return http
                .csrf().disable() // CSRF() 로인해서 post 요청이 막히는것을 해제해줌 / post 403에러 해결
                .authorizeHttpRequests(auth -> auth //auth를 받아서 어떤 리퀘스트를 열것인지
                        .antMatchers(HttpMethod.POST, "/articles").permitAll() //Role메서드 추가예정
                        .anyRequest().permitAll()) //auth를 받아서 어떤리퀘스트든 다열겠다
                .formLogin().and() //폼로그인 사용
                .build();
    }

Security설정관련 메서드 초반부 작성내용


@EntityListeners(AuditingEntityListener.class)
@MappedSuperclass

핵심은 위의 두가지 애너테이션이다

package main22.community.domain;

import lombok.Getter;
import lombok.ToString;
import org.springframework.data.annotation.CreatedBy;
import org.springframework.data.annotation.CreatedDate;
import org.springframework.data.annotation.LastModifiedBy;
import org.springframework.data.annotation.LastModifiedDate;
import org.springframework.data.jpa.domain.support.AuditingEntityListener;
import org.springframework.format.annotation.DateTimeFormat;

import javax.persistence.Column;
import javax.persistence.EntityListeners;
import javax.persistence.MappedSuperclass;
import java.time.LocalDateTime;
@Getter
@ToString
@EntityListeners(AuditingEntityListener.class)//엔티티 Auditing이 동작하기위해 필수추가
@MappedSuperclass  //Jpa애너테이션
public class AuditingFields { // 공통 필드에 대한 처리

    @DateTimeFormat(iso = DateTimeFormat.ISO.DATE_TIME) //파라미터 파싱에 대한 룰
    @CreatedDate
    @Column(nullable = false, updatable = false) //수정불가
    private LocalDateTime createdAt; // 생성일시
    @CreatedBy
    @Column(nullable = false, length = 100)//누가 만들었는지에 대한 정보 JpaConfig에서 확인
    private String createdBy; // 생성자
    @DateTimeFormat(iso = DateTimeFormat.ISO.DATE_TIME) //파라미터 파싱에 대한 룰
    @LastModifiedDate
    @Column(nullable = false)
    private LocalDateTime modifiedAt; // 수정일시
    @LastModifiedBy
    @Column(nullable = false, length = 100)
    private String modifiedBy; // 수정자
}

이렇게 공통기능으로 자주쓰는 생성, 수정시간 관련된 컬럼을 따로 클래스로 따로 관리하고 엔티티 클래스에 상속해주면 코드를 줄일 수 있다.


또한 클래스로 따로 관리하면 공통기능에 대한 수정도 편리하다


rest api요청을 보낼때 해당 엔티티에 대한 검색기능을 사용할 수 있는 기술이다.


- 먼저 build.gradle 추가

dependencies {
    implementation 'org.springframework.boot:spring-boot-starter-actuator'
    implementation 'org.springframework.boot:spring-boot-starter-web'
    runtimeOnly 'com.mysql:mysql-connector-j'
    implementation 'org.springframework.boot:spring-boot-starter-data-jpa'
    implementation 'org.springframework.boot:spring-boot-starter-data-rest' // data rest기능 / api빠르게만들수있음
    implementation 'org.springframework.data:spring-data-rest-hal-explorer' // 해당내용을 시각적으로 보는것
    runtimeOnly 'com.h2database:h2'
    compileOnly 'org.projectlombok:lombok'
    developmentOnly 'org.springframework.boot:spring-boot-devtools'
    annotationProcessor 'org.projectlombok:lombok'
    testImplementation 'org.springframework.boot:spring-boot-starter-test'

    // queryDSL 설정
    // 엔티티 검색기능 사용 가능
    implementation "com.querydsl:querydsl-jpa"
    implementation "com.querydsl:querydsl-core"
    implementation "com.querydsl:querydsl-collections"
    annotationProcessor "com.querydsl:querydsl-apt:${dependencyManagement.importedProperties['querydsl.version']}:jpa" // querydsl JPAAnnotationProcessor 사용 지정
    annotationProcessor "jakarta.annotation:jakarta.annotation-api" // java.lang.NoClassDefFoundError (javax.annotation.Generated) 대응 코드
    annotationProcessor "jakarta.persistence:jakarta.persistence-api" // java.lang.NoClassDefFoundError (javax.annotation.Entity) 대응 코드
}

tasks.named('test') {
    useJUnitPlatform()
}

// Querydsl 설정부
def generated = 'src/main/generated'  //파일경로  
// build디렉터리 안에 있는걸 눈에 보이게 꺼내옴
// ide같은 툴을 사용해서 발생할 수 있는 잠재적 문제를 해결하기위함

// querydsl QClass 파일 생성 위치를 지정
tasks.withType(JavaCompile) {
    options.getGeneratedSourceOutputDirectory().set(file(generated))
}

// java source set 에 querydsl QClass 위치 추가
sourceSets {
    main.java.srcDirs += [ generated ]
}

// gradle clean 시에 QClass 디렉토리 삭제
clean {
    delete file(generated)  //build clean할때 해당 파일도 같이 삭제

- Article 엔티티에 대한 레파지토리

package main22.community.repository;

import com.querydsl.core.types.dsl.DateTimeExpression;
import com.querydsl.core.types.dsl.StringExpression;
import main22.community.domain.entity.Article;
import main22.community.domain.entity.QArticle;
import org.springframework.data.jpa.repository.JpaRepository;
import org.springframework.data.querydsl.QuerydslPredicateExecutor;
import org.springframework.data.querydsl.binding.QuerydslBinderCustomizer;
import org.springframework.data.querydsl.binding.QuerydslBindings;
import org.springframework.data.rest.core.annotation.RepositoryRestResource;
//@Repository안붙여도 정상동작함 상속하는 클래스에 이미 붙어있음
@RepositoryRestResource // spring data rest 사용하기 위함
public interface ArticleRepository extends
        JpaRepository<Article, Long>,
        QuerydslPredicateExecutor<Article>, //해당 엔티티 안에있는 모든 검색기능을 추가해줌 // 완전 동일해야만 동작
        QuerydslBinderCustomizer<QArticle> // 부분검색, 대소문자 구분 등을 위함
{
    @Override
    default void customize(QuerydslBindings bindings, QArticle root){
        //Article에 대해 선택적인 필드에 대한 검색
        bindings.excludeUnlistedProperties(true); //리스팅 하지 않은 프로퍼티 검색 제외
        bindings.including(root.title, root.content, root.hashtag, root.createdAt, root.createdBy); //검색 컬럼
        bindings.bind(root.title).first(StringExpression::containsIgnoreCase); // like '%${v}%'/ 부분검색
        bindings.bind(root.content).first(StringExpression::containsIgnoreCase);
        bindings.bind(root.hashtag).first(StringExpression::containsIgnoreCase);
        bindings.bind(root.createdAt).first(DateTimeExpression::eq);//원하는 날짜검색 /시분초 동일하게 넣어야함
        bindings.bind(root.createdBy).first(StringExpression::containsIgnoreCase);
    }
}

- application.yml 설정부

spring:
  data: # spring data rest - 관련 설정
    rest:
      base-path: /api  #endpoint start path
      detection-strategy: annotated


article엔티티의 title 테이블 검색방법 ex) http://localhost:8080/api/articles?title="(부분)검색" 으로 사용하면 된다

설정파일들.zip
0.00MB

진행사항 :  API명세서 수정, AWS계정 생성 및 테스트서버 배포


그동안 딱히 새로운 오류가 없어 작성하지 않았다 


AWS계정 생성하고 인스턴스를 직접 생성하는건 처음이라 며칠동안 삽질하고 정리한다.


* AWS계정 생성 및 서버 배포방법 정리


1. 프리티어 계정으로 생성


2. EC2 인스턴스 생성

- Ubuntu 선택 / micro 선택 / 인증서는 PPK키를 받아야 putty를 통해 접속할 때 용이하다.

- IAM을 생성 / 권한정책 및 신뢰관계는 다음과 같이 설정 및 수정한다

IAM권한 정책 설정
IAM 신뢰관계 설정

- 생성된 EC2인스턴스 우클릭 -> 보안 -> IAM 역할수정 -> 생성된 IAM 연결


- 보안 -> 인바운드 규칙 아래와 같이 추가

추가된 보안 인바운드 규칙

- 탄력적 IP는 생성 후 즉시 EC2인스턴스에 연결해야 요금이 부과되지 않는다. 나는 몇분동안 연결안된채로 놔두었더니 아주 조금의 요금이 부과되었음! 


3. 인스턴스 실행 -> putty접속

putty ppk키 등록

- 발급받은 ppk인증서는 connection->SSH->Auth-> credentials에서 다음과같이 불러오고 할당받은 퍼블릭Ipv4또는 탄력적 Ip주소를 기입한다 (SSH 포트번호는22)


* EC2 인스턴스 접속 후 개발 환경 구축

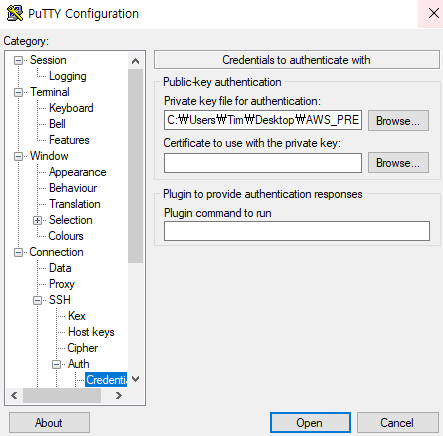
- Putty SSH통신을 통해 접속하고 아이디를 입력하여(보통ID는 Ubuntu) 로그인한 뒤 다음의 설정을 마친다


패키지 매니저가 관리하는 패키지의 정보를 최신 상태로 업데이트하기 위해서 아래 명령어를 터미널에 입력한다.

$ sudo apt update


어느 정도 시간이 지나고 업데이트 과정이 끝나면 java를 설치해야 한다.

$ sudo apt install openjdk-11-jre-headless

아래와 같은 확인창이 나올경우 "Y"를 입력한다

Reading package lists... Done
Building dependency tree
Reading state information... Done
The following additional packages will be installed:
  libasound2 libasound2-data libgraphite2-3 libharfbuzz0b
Suggested packages:
  libasound2-plugins alsa-utils libnss-mdns fonts-dejavu-extra fonts-ipafont-gothic fonts-ipafont-mincho fonts-wqy-microhei
  | fonts-wqy-zenhei fonts-indic
The following NEW packages will be installed:
  libasound2 libasound2-data libgraphite2-3 libharfbuzz0b openjdk-11-jre-headless
0 upgraded, 5 newly installed, 0 to remove and 70 not upgraded.
Need to get 37.9 MB of archives.
After this operation, 173 MB of additional disk space will be used.
Do you want to continue? [Y/n]

설치 과정이 마무리되면, java -version 명령어를 입력하여 java 라이브러리가 설치가 완료되었는지 확인합니다. 명령어를 입력했는데 오류가 난다면 java 설치 과정이 정상적으로 마무리되지 않은 것입니다.


다음으로 AWS CLI를 설치합니다.

$ curl "https://awscli.amazonaws.com/awscli-exe-linux-x86_64.zip" -o "awscliv2.zip"
$ sudo apt install unzip
$ unzip awscliv2.zip
$ sudo ./aws/install


aws --version 명령어를 통해 AWS CLI의 설치 여부를 확인.

$ aws --version

aws-cli/2.1.39 Python/3.8.8 Darwin/20.4.0 exe/x86_64 prompt/off
# 이런식의 문구가 보인다면 설치가 성공적으로 마무리된 것입니다.


다음으로 EC2 인스턴스에 CodeDeploy Agent를 설치합니다. 아래 명령어를 차례대로 입력

$ sudo apt update
$ sudo apt install ruby-full                # [Y / n] 선택시 Y 입력
$ sudo apt install wget
$ cd /home/ubuntu
$ sudo wget https://aws-codedeploy-ap-northeast-2.s3.ap-northeast-2.amazonaws.com/latest/install
$ sudo chmod +x ./install
$ sudo ./install auto > /tmp/logfile


위의 마지막 명령어 실행 후 다음의 이미지와 같은 에러가 발생하는 경우엔 관련 로그를 지운 뒤 다시 설치.

삭제 로그 파일

  • /tmp/codedeploy-agent.update.log
  • /tmp/logfile


설치가 완료되면 다음 명령어를 이용해 서비스가 실행중인지 확인

$ sudo service codedeploy-agent status


* 파이프라인 생성

1. CodePipeline 검색 후 접속

2. 배포 ->EC2/온프레미스로 애플리케이션 생성  

3. 파이프라인 생성 깃헙과 연결하였다.

연결되어 배포된 파이프라인 이다.


- Source 오류 : Github연결 혹은 애플리케이션 생성시 발생한 오류일 확률이 높다

- Build 오류 : 작성한 코드에 관련한 오류들 / 로컬환경에서 정상적으로 작동한다면 scripts혹은 yml파일 설정들에 있는 경로들이 문제일 확률이 매우 높다

- Deploy 오류 : 생성된 EC2와 연결과정에서 오류일 확률이 높다


참고할 설정파일들 올려둠

'Study > 기타' 카테고리의 다른 글

AWS 로컬 < -- > EC2 파일 복사하기  (0) 2023.03.18
AWS 수동배포  (0) 2023.03.18
AWS- IAM 사용자 추가 후 엑세스키 생성  (0) 2023.03.14
HTTP  (1) 2022.11.30
Html / Css  (0) 2022.11.17

02.22

진행사항 Tag클래스 및 패키지로 분할하였으며 DB저장 작업 진행


* 증상 : 서버를 실행하면 즉시 종료

에러 : UnsatisfiedDependencyException: Error creating bean with name 'questionController' defined in file


해결방법 : dto에서 Post Response의 변수명이 달라서 발생하는 듯 / 변수명을 일치시켜줬더니 정상 동작함


* 증상 : responseDto를 추가했더니 오류발생

에러 : constructor TagResponseDto() is already defined in class pre14.stackoverflow.tag.TagResponseDto


해결방법 : ResponseDto에서 @RequiredArgConstructor을 제거


* Question엔티티에서 아래와같이 @Builder를 사용하면 

@Builder  //QuestionDto.Post클래스타입 매개변수를 Question타입으로 변환하기 위함
public Question(final Long questionId,
                final String title,
                final String contents) {
    this.questionId = questionId;
    this.title = title;
    this.contents = contents;
}

아래와 같이 .builder()을 사용할 수 있다.

public Question toQuestion() {
    return Question.builder()
            .title(title)
            .contents(contents)
            .build();
}


수정한 QuestionService클래스의 CreateQuestion부분


* 증상 : 컴파일에러

에러 : java.lang.NullPointerException: null


해결방법 : Service클래스 setmember()의 에러로 확인하여 수정하였음

'Study > 프로젝트 일지' 카테고리의 다른 글

Intellij - 모듈 ....의 SDK가 지정되지 않았습니다. 실행오류 해결  (0) 2023.03.19
pre_02.21  (0) 2023.02.21
pre_02.20  (0) 2023.02.21
pre_02.17  (0) 2023.02.18
pre_02.16  (0) 2023.02.17

진행사항 : 질문 게시판, 회원정보, 답변에  필요한 각각의 매핑

- Tag 클래스 추가하여 게시판과 매핑연동 완료


증상 : member Post 500에러

에러 : Servlet.service() for servlet [dispatcherServlet] in context with path [] threw exception [Request processing failed;


해결방법 : 생성자 관련 문제로 추정하였고, dto쪽에 @AllArgsConstructor 대신@RequiredArgsConstructor 넣었더니 해결하였음


증상 : QuestionTag클래스 매핑 작업간 Post500에러 발생

에러: .NoSuchMethodError: 'java.util.List pre14.stackoverflow.questions.dto.QuestionDto$Post.getTags()'


해결방법 : QuestionTagDto에 tagId가 없어서 오류가 발생하였음

@Getter
@RequiredArgsConstructor
public class QuestionTagDto {
        private Long tagId; //필수
        private String tagName;
}


'Study > 프로젝트 일지' 카테고리의 다른 글

Intellij - 모듈 ....의 SDK가 지정되지 않았습니다. 실행오류 해결  (0) 2023.03.19
pre_02.22  (0) 2023.02.22
pre_02.20  (0) 2023.02.21
pre_02.17  (0) 2023.02.18
pre_02.16  (0) 2023.02.17

진행사항 : member, question, answer각각 crud완성 후 팀원들의 개인 브랜치 -> dev브랜치 병합 

- 많은 충돌과 에러가 발생하였으나 결국 해결..


* 깃 병합 취소하기

git reset merge ‘head번호‘ // insite에서 확인 가능


* 증상 : merge 후 서버가 실행 후 바로 종료되어버림

에러 : BeanDefinitionStoreException: Failed to parse configuration class


해결방법 : out 폴더 삭제 -> Gradle -> Task -> Clean -> build -> 재실행


'Study > 프로젝트 일지' 카테고리의 다른 글

pre_02.22  (0) 2023.02.22
pre_02.21  (0) 2023.02.21
pre_02.17  (0) 2023.02.18
pre_02.16  (0) 2023.02.17
pre _02.15  (0) 2023.02.15

02.17

스택오버플로우 클론 프로젝트에서 Question 부분을 담당하고있음


진행사항

question부분 crud 작업


* 증상 : crud를 모두 완성했는데 bean관련 exception이 뜨고 실행이 종료

exception 내용 : BeanDefinitionStoreException: Failed to parse configuration class


해결 방법 :

폴더 변경 전의 bean 이름이 사라지지 않아 폴더 변경 후의 bean 이름과 중복된다고 되어 있습니다


1. 프로젝트 안에 out 폴더를 찾아 삭제한다.

2. gradle에서 clean을 실행한다.

3. gradle에서 build를 실행한다.

이 과정을 진행했더니 말끔히 진행이 잘 된다.


* 증상 : post를 진행하면 401에러가 뜬다 / localhost접속 시 login페이지로만 접속된다

해결 방법

//  implementation 'org.springframework.boot:spring-boot-starter-security'
//     testImplementation 'org.springframework.security:spring-security-test'

요 두놈을 주석처리 하였음

security의존성을 추가하고 아무것도 하지않아서 login페이지로 이동하는거였음!


* 증상 : 위에것을 해결했더니 이번엔 500에러가 발생

exception : .SQLSyntaxErrorException: Unknown column 'question0_.contents' in 'field list’


해결방법 : entity클래스와 postdto상의 변수명을 일치시켰다 content -> contens

// 기존 question테이블에서 contents가 아니라 body로 되어있어서 삭제 후 재실행 하였음


* 증상 : 500에러 발생

exception : SQLIntegrityConstraintViolationException: Column 'contents' cannot be null


해결방법 :

@Column(nullable = false)

 주석처리하였음

그런데 generatedMapperlmpl 부분에 setcreated를 해주는 방법 등 여러 가지를 해봐도 작성시간은 아무리해도 null로 표시되고 안뜬다 ㅠㅠ 해결방법찾아봐야함


- tip. mysqlenum 문자열값으로 저장하기

@Enumerated(value = EnumType.STRING) //enum값 string으로 출력
private QuestionStatus questionStatus = QuestionStatus.QUESTION_REGISTRATION;


* 증상 : mysql(LocalDateTime)현재 시간이 추가되지 않음


해결방법 :

@CreatedDate
@Column(nullable = false)
private LocalDateTime createdAt ;
@LastModifiedDate
private LocalDateTime modifiedAt;

과 짝이 되는 애너테이션이 있었음


- 에플리케이션(실행파일) 필요 애너테이션 :

@EnableJpaAuditing

- 엔티티 클래스 필요 애너테이션

@EntityListeners(AuditingEntityListener.class)
 

'Study > 프로젝트 일지' 카테고리의 다른 글

pre_02.22  (0) 2023.02.22
pre_02.21  (0) 2023.02.21
pre_02.20  (0) 2023.02.21
pre_02.16  (0) 2023.02.17
pre _02.15  (0) 2023.02.15

* mysql연동관련 설정방법


- jpa를 사용하기위해 sql 연동하기 위한 yml파일

spring:
  datasource:
    driver-class-name: com.mysql.cj.jdbc.Driver
    url: jdbc:mysql://localhost:3306/stackoverflow?serverTimezone=Asia/Seoul
    username: root
    password: 1234

  jpa:
    hibernate:
      ddl-auto: create  # (1) ??? ?? ??
    show-sql: true      # (2) SQL ?? ??
    properties:
      hibernate:
        format_sql: true  # (3) SQL pretty print
  logging:
    level:
      org:
        springframework:
          orm:
            jpa: DEBUG


의존성 세팅

implementation 'org.springframework.boot:spring-boot-starter-web'
runtimeOnly 'com.mysql:mysql-connector-j'
implementation 'org.springframework.boot:spring-boot-starter-data-jpa'
implementation 'org.springframework.boot:spring-boot-starter-jdbc'
compileOnly 'org.projectlombok:lombok'
annotationProcessor 'org.projectlombok:lombok'
testImplementation 'org.springframework.boot:spring-boot-starter-test'
implementation 'org.mapstruct:mapstruct:1.5.3.Final'
annotationProcessor 'org.mapstruct:mapstruct-processor:1.5.3.Final'
implementation 'org.springframework.boot:spring-boot-starter-validation'
implementation 'org.springframework.boot:spring-boot-starter-mail'


mysql연결시 겪을 수 있는 실수와 에러

- 의존성에 mysql-connector-java가 아닌 j를 써야함(mysql버전이 낮을 때 발생하는 오류라고함)


-Unable to create requested service [org.hibernate.engine.jdbc.env.spi.JdbcEnvironment] 이라는 오류가 뜬 경우

yml파일 url주소 db이름에 해당하는 데이터베이스를 반드시 생성해야함


table 이름은 반드시 소문자 이어야함


깃 다른 브랜치에 push하는 방법

git push origin <branch 1>:<branch 2> 명령어를 이용하면 branch 1의 수정 사항을 branch 2에 푸시할 수 있다.

- git push origin branch1:branch2


깃 다른 브랜치 pull 하는 방법

git pull origin <branch name>


------------------------- 머지하기

1. merge 할 브랜치 이동


2. git merge 명령어 호출


3. git push 명령어 or vsCode 동기화 클릭


ex) 내 브랜치(myBranch) 소스 mastermerge할때


1. git checkout master


2. git merge myBranch


3. git push


-------

깃 임시저장 후 다른브랜치로 이동하기


git stash

git checkout 브랜치명 //

git stash pop // 다시 불러오기


gitignore 설정

gitignore파일 상단에 **/application.yml 추가

git rm r --cached //추적되는 캐시삭제


git conflict(충돌) 해결

git merge --abort // 머지 취소


모든게 안되면 브랜치 이사가자

db연결 세팅과 협업을 위한 준비절차는 어느정도 된것같으니 본격 개발을 시작해보자!

'Study > 프로젝트 일지' 카테고리의 다른 글

pre_02.22  (0) 2023.02.22
pre_02.21  (0) 2023.02.21
pre_02.20  (0) 2023.02.21
pre_02.17  (0) 2023.02.18
pre _02.15  (0) 2023.02.15

pre_요구사항 정의서ver1.0.hwp
0.05MB
API명세서ver1.0.hwp
0.05MB

23.02.15


진행 사항

- 요구사항 정의서

- API 명세서

- git project 칸반

- git Branch 나누기


해야할 일

- BE쪽에서 AWS 계정 생성해서 각 api에 더미데이터 넣어 전달

- 테이블 명세서 작성

 
팀프로젝트 시작!

front 쪽에서 AWS에 더미데이터가 있는 서버를 구축하여 잘 작동하는지 확인해 볼 수 있도록 공유해달라고 하였음

마음을 다지고 공부했던것들을 복습하며 프로젝트를 진행 해야겠다. 

'Study > 프로젝트 일지' 카테고리의 다른 글

pre_02.22  (0) 2023.02.22
pre_02.21  (0) 2023.02.21
pre_02.20  (0) 2023.02.21
pre_02.17  (0) 2023.02.18
pre_02.16  (0) 2023.02.17

+ Recent posts